
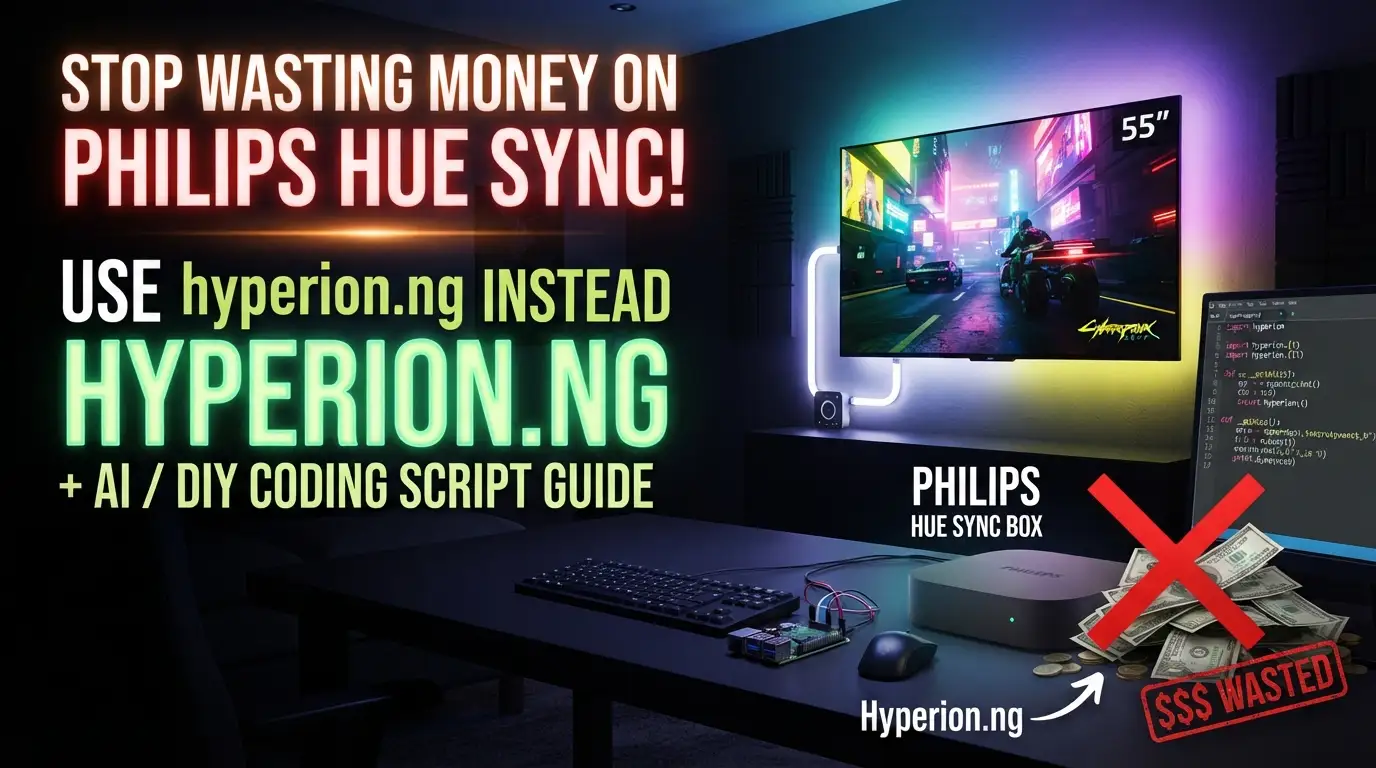
Stop Wasting Money on Philips Hue Sync! Use hyperion.ng Instead
Your living room looks like a cave. You've spent thousands on a 4K OLED, a soundbar that shakes the walls, and a streaming setup that would make Netflix engineers jealous. Yet when the lights go down for movie night, something feels... flat. The colors on screen explode with life, but your walls stay dead black. You're missing the secret weapon that transforms passive viewing into immersive cinema: ambient lighting. And here's the kicker—you don't need to drop $250 on Philips Hue Sync boxes or locked-down ecosystems. The solution? A free, open-source powerhouse that top home theater enthusiasts have been hiding from you. Welcome to hyperion.ng.
What is hyperion.ng?
hyperion.ng is the successor to the original Hyperion project—rebuilt from the ground up as "Hyperion Next Generation." This isn't some half-baked fork or abandoned side project. It's a mature, actively developed open-source implementation of bias lighting (also known as ambient lighting), the same technology that premium TV manufacturers like Philips have baked into their sets for decades under names like "Ambilight."
The project lives at hyperion-project/hyperion.ng and represents one of the most sophisticated DIY lighting solutions available today. With continuous integration through GitHub Actions, active CodeQL security analysis, and a thriving community forum, this isn't hobbyist code—it's production-grade software that happens to be free.
What makes hyperion.ng genuinely exciting in 2024 is its architectural evolution. The original Hyperion was revolutionary for its time, but hyperion.ng introduces a decoupled priority channel system that fundamentally changes how LED data flows through the system. Providers can push lighting data and disconnect immediately—no persistent connection required. This enables scenarios that were previously impossible: remote mobile apps, ephemeral script triggers, and complex multi-source integrations that don't fight for control.
The project supports an insane range of LED devices and video grabbers—from dirt-cheap WS2812B strips to professional-grade HDMI capture solutions. Whether you're running a Raspberry Pi Zero 2 W hidden behind your TV or a beefy x86 server managing multiple zones, hyperion.ng scales to match your ambition and your budget.
Key Features That Destroy the Competition
Let's dissect what makes hyperion.ng technically superior to commercial alternatives:
Ridiculously Low CPU Footprint
Hyperion.ng is optimized for System-on-Chip devices like the Raspberry Pi. The developers have squeezed every ounce of performance from the pipeline, ensuring that your media center doesn't turn into a space heater during 4K HDR playback. This isn't accidental—it's architectural. The capture, processing, and LED driving pipelines are designed for efficiency from day one.
JSON API for Unlimited Integration
The comprehensive JSON interface isn't an afterthought—it's a first-class citizen. Every function, every state, every configuration parameter is exposed programmatically. Want to trigger a "movie starting" lighting sequence from your Home Assistant automation? Trivial. Need to sync your LED colors with your music player's BPM? Doable. The API enables composable, scriptable home theater ecosystems that no closed product can match.
Command Line Utility for Power Users
hyperion-remote and associated tools provide headless, automated control perfect for integration with cron jobs, systemd services, or CI/CD pipelines for your home lab. Test configurations, switch effects, and manage instances without touching a browser.
Decoupled Priority Channels
This is the secret sauce. Traditional ambient lighting systems bind LED data sources to persistent connections. Hyperion.ng's priority channels allow fire-and-forget data submission. A script can flash a notification color and exit immediately. A remote app can set a mood and disconnect. Multiple sources coexist without coordination complexity.
Black Border Detection & Processing
Letterboxed content destroys naive ambient lighting. Hyperion.ng's intelligent border processor detects and compensates for black bars, ensuring your LEDs reflect actual content colors—not the black void of cinematic aspect ratios.
Python↗ Bright Coding Blog-Powered Effect Engine
With 39 built-in effects and full scriptability, you're not limited to screen mirroring. Create custom animations, reactive patterns, and generative art that responds to system events, time of day, or external triggers.
Multi-Language Web Interface
Configuration and remote control through a modern web UI, localized for global accessibility. No app store dependencies, no platform gatekeeping—just a browser and your imagination.
Real-World Use Cases Where hyperion.ng Dominates
The Cinematic Immersion Setup
You've invested in a projector and 120-inch screen. The image fills your vision, but the room stays dark. Hyperion.ng with HDMI video grabbers captures the edge colors in real-time and drives LED strips around your screen's perimeter. The result? Colors bleed beyond the frame, expanding your perceived image size and reducing eye strain during long viewing sessions. This is bias lighting's core benefit—scientifically proven to improve perceived contrast and reduce fatigue.
The Multi-Zone Gaming Battlestation
Your setup has evolved: ultrawide monitor, secondary displays, desk perimeter lighting. Commercial solutions force you into their ecosystem. Hyperion.ng lets you define independent zones with different capture sources. Your main monitor mirrors game colors, your secondary display shows Discord notifications in ambient form, and your desk LEDs pulse with system load. All synchronized, all programmable.
The Headless Home Theater Server
Running Kodi, Plex, or Jellyfin on a Raspberry Pi 4? Hyperion.ng's minimal resource usage means you can capture and drive LEDs from the same device serving your media. No separate box, no additional power draw, no network complexity. Install, configure, forget—it just works.
The Programmable Smart Home Integration
Home Assistant users, this is your moment. Hyperion.ng's JSON API integrates cleanly with MQTT, Node-RED, and native Home Assistant components. Create automations that dim lights when playback starts, flash red when your doorbell rings during a movie, or cycle through holiday themes on schedule. Your lighting becomes contextually intelligent, not just reactive.
Step-by-Step Installation & Setup Guide
Ready to escape the commercial ecosystem? Here's your complete deployment path.
Platform Selection & Prerequisites
Hyperion.ng supports multiple platforms. For most users, a Raspberry Pi 4 or Raspberry Pi Zero 2 W provides the sweet spot of performance, power efficiency, and size. For x86 users, Debian/Ubuntu derivatives are officially supported.
Verify your LED hardware compatibility at the supported hardware documentation before proceeding.
Installation Methods
Method 1: Pre-built Packages (Recommended)
The Hyperion project maintains a package repository with automated builds:
# Add the Hyperion repository (Debian/Ubuntu/Raspberry Pi OS)
curl -fsSL https://releases.hyperion-project.org/hyperion.pub.key | sudo gpg --dearmor -o /usr/share/keyrings/hyperion.pub.gpg

echo "deb [signed-by=/usr/share/keyrings/hyperion.pub.gpg] https://releases.hyperion-project.org $(lsb_release -cs) main" | sudo tee /etc/apt/sources.list.d/hyperion.list

# Update and install
sudo apt update
sudo apt install hyperion
Method 2: GitHub Releases
For manual installation or non-Debian systems, download directly from the Hyperion release page:
# Example: Download latest ARM64 release (adjust for your architecture)
wget https://github.com/hyperion-project/hyperion.ng/releases/download/2.0.16/Hyperion-2.0.16-Linux-aarch64.deb
sudo dpkg -i Hyperion-2.0.16-Linux-aarch64.deb
Method 3: Build from Source
For developers or cutting-edge features, compile manually:
# Clone the repository
git clone https://github.com/hyperion-project/hyperion.ng.git
cd hyperion.ng

# Follow platform-specific instructions in the documentation
cat doc/development/CompileHowto.md
Post-Installation Configuration
After installation, hyperion.ng runs as a system service. Access the web interface:
# Verify service status
sudo systemctl status hyperion

# The web interface is available at
# http://your-device-ip:8090
Critical first steps in the web UI:
- LED Hardware Configuration: Define your LED type (WS2812B, APA102, etc.), count, and GPIO pin or SPI device
- Video Capture Setup: Configure your grabber source—USB capture device, screen capture, or platform-specific grabber
- Processing Tuning: Adjust smoothing, black border detection thresholds, and color calibration
- Network Services: Enable the JSON server port (default: 19444) for API access
Hardware Wiring Essentials
For WS2812B strips on Raspberry Pi:
# Enable SPI interface (required for some LED controllers)
sudo raspi-config
# Navigate: Interface Options → SPI → Enable

# For GPIO-driven strips, ensure proper level shifting
# 3.3V Pi GPIO → 5V LED data requires a 74HCT245 or similar level shifter
# Power injection at strip ends prevents voltage drop color shift
REAL Code Examples from hyperion.ng
Let's examine actual implementation patterns using hyperion.ng's documented interfaces and capabilities.
Example 1: JSON API Control for Home Automation
The JSON API enables remote control without persistent connections. Here's a practical Python implementation for triggering effects:
import json
import socket

# Configuration for your hyperion.ng instance
HYPERION_HOST = "192.168.1.50"
HYPERION_PORT = 19444  # Default JSON server port

def send_hyperion_command(command_dict):
    """
    Send a fire-and-forget command to hyperion.ng.
    No persistent connection required—perfect for scripts and automations.
    """
    # Create TCP socket connection
    sock = socket.socket(socket.AF_INET, socket.SOCK_STREAM)

    try:
        sock.connect((HYPERION_HOST, HYPERION_PORT))

        # Serialize command to JSON with newline termination (protocol requirement)
        message = json.dumps(command_dict) + "\n"
        sock.sendall(message.encode('utf-8'))

        # Optional: receive and parse response
        response = sock.recv(4096).decode('utf-8')
        return json.loads(response)

    finally:
        # Always close—hyperion.ng handles the command asynchronously
        sock.close()

# Set a solid color (priority 50, duration 5000ms)
color_command = {
    "command": "color",
    "color": [255, 100, 0],  # Warm orange
    "priority": 50,
    "duration": 5000,  # Auto-clear after 5 seconds
    "origin": "MyHomeAutomation"
}

result = send_hyperion_command(color_command)
print(f"Color set result: {result}")

# Clear the color when done, returning to lower-priority sources
# (like video capture or effects)
clear_command = {
    "command": "clear",
    "priority": 50
}

send_hyperion_command(clear_command)
What's happening here? The script demonstrates hyperion.ng's priority channel architecture. We set a color at priority 50, which overrides video capture (typically priority 100+) but yields to higher-priority sources like user alerts. The duration parameter enables automatic cleanup—no need to maintain connection or manually clear. This is impossible with systems requiring persistent client connections.
Example 2: Command Line Integration for Automated Environments
Hyperion.ng includes hyperion-remote for shell scripting:
#!/bin/bash
# /usr/local/bin/movie-mode.sh
# Triggered by Kodi/Jellyfin playback start via webhook or plugin

# Store current state before modification
hyperion-remote --server 192.168.1.50 --configget > /tmp/hyperion-backup.json

# Enable cinema-optimized processing
# -L: Set LED color (minimal warm bias for letterboxed content)
hyperion-remote --server 192.168.1.50 --color 255,160,40 --priority 100 --duration 0

# Alternative: Start a specific effect for intermission
# hyperion-remote --server 192.168.1.50 --effect "Candle" --priority 100

# When playback ends, restore normal operation
# hyperion-remote --server 192.168.1.50 --clear 100
Key insight: The --priority flag aligns with hyperion.ng's decoupled architecture. Multiple scripts can post commands at different priorities without coordination. A doorbell script at priority 1 flashes red; it automatically clears, and the previous source resumes. No state management, no race conditions.
Example 3: Effect Engine Scripting (Python)
Hyperion.ng's 39 built-in effects are just the beginning. The Python effect engine enables custom creations:
# Custom effect: System Load Visualizer
# Place in hyperion's effects directory, reference from web UI

import hyperion
import time
import os

# Get effect parameters from hyperion runtime
rotation_speed = float(hyperion.args.get('rotation-speed', 1.0))
intensity = float(hyperion.args.get('intensity', 0.5))

def get_cpu_load():
    """Read 1-minute load average from procfs."""
    with open('/proc/loadavg', 'r') as f:
        return float(f.read().split()[0])

# Main effect loop
while not hyperion.abort():
    load = get_cpu_load()

    # Map load to color: green (idle) → yellow → red (maxed)
    # Normalize assuming 4-core system (adjust for your hardware)
    normalized = min(load / 4.0, 1.0)

    red = int(255 * normalized)
    green = int(255 * (1 - normalized))
    blue = 0

    # Apply intensity parameter for subtlety
    red = int(red * intensity)
    green = int(green * intensity)

    # Set all LEDs to computed color
    led_data = [(red, green, blue)] * hyperion.ledCount
    hyperion.setColor(led_data)

    # Update rate controlled by rotation_speed
    time.sleep(1.0 / rotation_speed)
This unlocks creative possibilities: Network traffic visualization, weather-based ambient moods, stock price alerts, security system status—any data source becomes potential lighting input. The hyperion module provides runtime integration; parameters pass through the web UI for user customization without code changes.
Example 4: Black Border Configuration
Proper border detection is crucial for cinematic content. Here's the JSON configuration structure:
{
  "blackborderdetector": {
    "enable": true,
    "threshold": 0.01,
    "unknownFrameCnt": 600,
    "borderFrameCnt": 50,
    "maxInconsistentCnt": 10,
    "blurRemoveCnt": 1,
    "mode": "default"
  }
}
Parameter breakdown:
threshold: 0.01 means pixels below 1% brightness treated as blackunknownFrameCnt: Frames before declaring border state uncertain (10 seconds at 60fps)borderFrameCnt: Consecutive frames confirming border before applyingmode:"default"for automatic,"classic"for legacy behavior,"osd"for on-screen display preservation
Advanced Usage & Best Practices
Capture Latency Optimization
USB video grabbers introduce variable latency. Measure your pipeline with:
# Enable debug logging to trace capture-to-LED latency
hyperiond -d --verbose
Target sub-50ms for gaming, sub-100ms for video. If exceeded, consider platform-native grabbers (DispmanX on Raspberry Pi, DX11/Metal on desktop) instead of USB devices.
Color Calibration for Accuracy
Out-of-the-box colors rarely match your display. Use the web UI's color calibration wizard or manual JSON:
{
  "color": {
    "channelAdjustment": [
      {
        "id": "default",
        "leds": "*",
        "pureRed": {"red": 255, "green": 0, "blue": 0},
        "pureGreen": {"red": 0, "green": 255, "blue": 0},
        "pureBlue": {"red": 0, "green": 0, "blue": 255},
        "gammaRed": 1.5,
        "gammaGreen": 1.5,
        "gammaBlue": 1.5
      }
    ]
  }
}
Gamma correction (typically 1.5-2.5) compensates for LED non-linearity and human perception. Calibrate against reference patterns from Lagom LCD test.
Multi-Instance for Complex Setups
Running multiple LED zones? Deploy separate hyperion.ng instances on different ports:
# Instance 1: TV backlight (default)
sudo systemctl enable hyperion@main

# Instance 2: Desk ambient (custom config)
sudo cp /etc/hyperion/main.config.json /etc/hyperion/desk.config.json
# Edit desk.config.json: change "jsonServer" port to 19445, update LED hardware
sudo systemctl enable hyperion@desk
Comparison with Alternatives
| Feature | hyperion.ng | Philips Hue Sync | DIY FastLED/Arduino |
|---|---|---|---|
| Cost | Free (hardware only) | $250+ box + $70+/bulb | $5-30 controller |
| Video Capture | USB grabbers, native, screen | HDMI only | Manual/limited |
| API/Integration | Full JSON + CLI | Limited, cloud-dependent | Serial protocols |
| CPU Efficiency | Optimized for SoC | Dedicated hardware | Varies |
| Effect Engine | 39 built-in + Python custom | Preset scenes only | C++ only, complex |
| Priority System | Decoupled channels | Single source | None |
| Black Border | Advanced detection | Basic | None |
| Community | Active open source | Corporate | Fragmented |
| Lock-in Risk | None (self-hosted) | High (discontinued support) | Low |
The verdict: Philips Hue Sync offers plug-and-play simplicity at extreme cost and ecosystem lock-in. DIY Arduino solutions provide cheap hardware control but require rebuilding hyperion.ng's entire software stack. Hyperion.ng delivers professional-grade features with hobbyist accessibility—the sweet spot for serious enthusiasts.
FAQ
Q: Will hyperion.ng work with my existing Philips Hue lights?
A: Yes, through the Philips Hue LED device support. However, for responsive ambient lighting, addressable LED strips (WS2812B, SK6812) provide superior update rates and color accuracy. Hue bulbs are better for room ambiance than screen-reactive lighting.
Q: What's the cheapest viable hardware setup?
A: Raspberry Pi Zero 2 W ($15) + WS2812B strip ($10-20) + logic level shifter ($2) + 5V power supply ($10). Under $50 total, outperforming systems costing 10x more.
Q: Does hyperion.ng support HDR and Dolby Vision content?
A: HDR metadata passthrough depends on your capture hardware. HDMI 2.0b grabbers with HDR support work, but verify specific device compatibility. The LED color processing operates in SDR space, so tone mapping occurs in the capture pipeline.
Q: Can I run hyperion.ng in a Docker↗ Bright Coding Blog container?
A: Yes, community Docker images exist. However, hardware LED control requires --privileged mode or device passthrough, and video grabbers need careful USB mapping. Native installation remains recommended for production stability.
Q: How does the priority channel system handle conflicts?
A: Lower priority numbers win. Priority 1 (emergency alert) overrides priority 100 (video capture). When a higher-priority source clears, the next active lower priority automatically resumes. No manual state management required.
Q: Is hyperion.ng actively maintained?
A: Absolutely. Check the GitHub Actions badges and release history. The project has consistent commits, security analysis, and an engaged contributor base.
Q: Can I contribute without coding?
A: Yes! Translation contributions through POEditor, documentation improvements, hardware testing, and community support are all valuable. The project explicitly welcomes non-code contributions.
Conclusion
You've seen the problem: expensive, locked-down ambient lighting that treats your home theater as a revenue stream. You've discovered the escape route: hyperion.ng, a mature, feature-rich, completely free alternative that puts you in control. From its decoupled priority architecture to its Python effect engine, from Raspberry Pi efficiency to professional API integration, this is the tool that transforms passive viewing into immersive experience.
The commercial alternatives want your money and your data. Hyperion.ng wants your creativity. Install it this weekend. Tinker with effects. Automate with your smart home. Join the forum community and Discord server. And when someone asks how your setup looks so incredible, you'll know exactly what to tell them.
Start your build now: github.com/hyperion-project/hyperion.ng
Your walls are waiting to come alive.


