
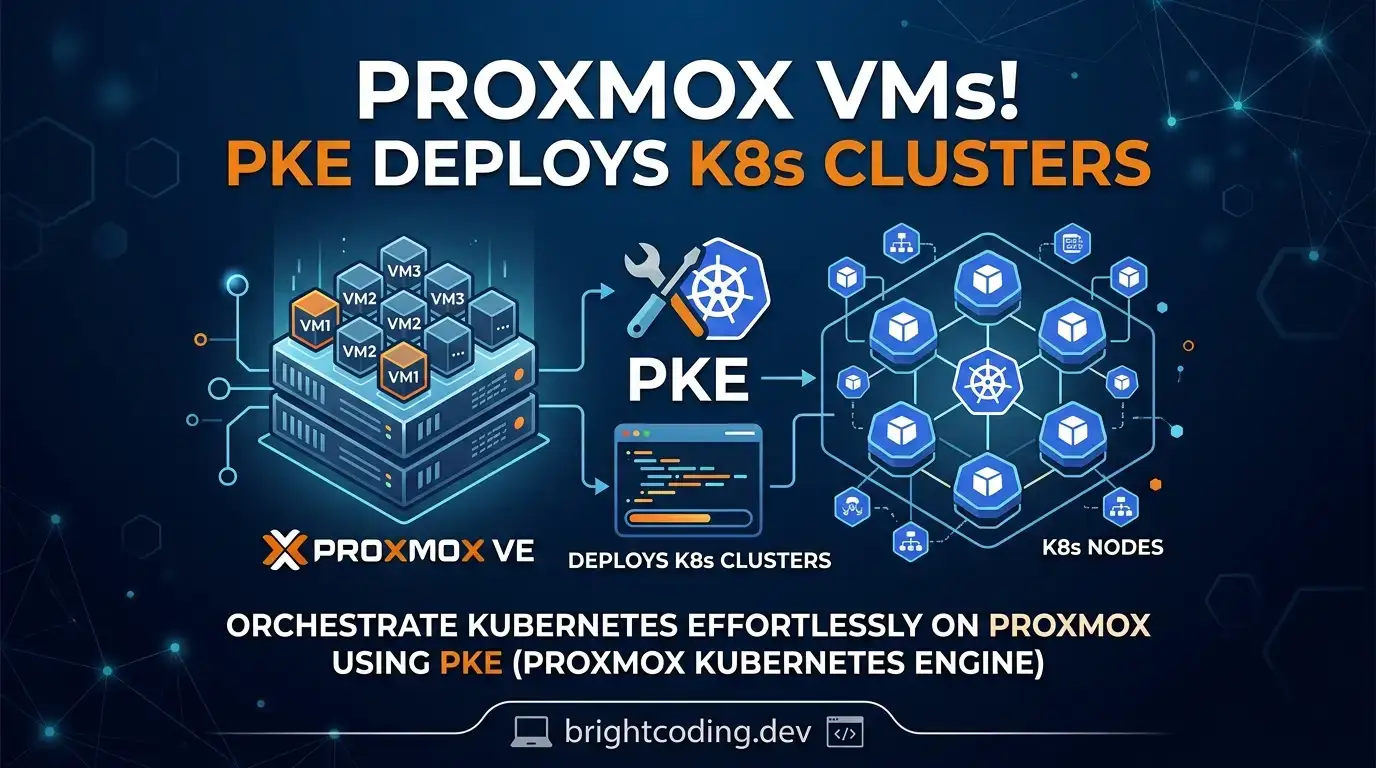
Stop Wrestling With Proxmox VMs! PKE Deploys K8s Clusters Automatically
What if every Kubernetes cluster you needed was just one API call away—running natively on your Proxmox infrastructure?
If you've ever spent hours manually provisioning VMs, tweaking cloud-init templates, and SSHing into Proxmox nodes just to stand up a Kubernetes cluster, you know the pain. The endless cycle of qm create, qm set, and praying your network bridge configuration doesn't mysteriously break. For homelabbers, it's a weekend-eating ritual. For small businesses, it's precious engineering time evaporating into infrastructure plumbing.
And the "solutions"? OpenShift demands enterprise licensing that costs more than your car. Tanzu locked you into VMware's ecosystem—right before they jacked up prices and alienated their entire customer base. Rancher is powerful but complex, another full-time job disguised as a platform. What if you could skip all of this? What if your Proxmox environment could become a true Kubernetes-as-a-Service platform—without modifying a single Proxmox node, without SSH access, without any hacks?
Enter PKE (Proxmox Kubernetes Engine). Built on the Cloud Native Computing Foundation's Cluster API, PKE transforms your existing Proxmox VE infrastructure into an automated, API-driven Kubernetes powerhouse. No agent installation. No node modifications. Just pure, declarative cluster management that scales from your home lab to your production data center. This isn't a workaround—it's the future of on-premises Kubernetes, and it's hiding in plain sight on GitHub.
Ready to see how the smartest infrastructure engineers are quietly revolutionizing their Proxmox deployments? Let's dive deep.
What Is Proxmox Kubernetes Engine (PKE)?
PKE is an open-source infrastructure provider for Cluster API that enables fully automated deployment and lifecycle management of highly available Kubernetes clusters directly on Proxmox VE environments. Created by the team at Caprox-eu, PKE bridges the gap between enterprise-grade Kubernetes orchestration and the world's most popular open-source hypervisor platform.
The project's philosophy is elegantly simple: no code is written when upstream contributions can suffice. Rather than building a monolithic platform that reinvents wheels, PKE orchestrates battle-tested CNCF projects into a cohesive, Proxmox-native experience. This approach keeps the architecture lean, maintainable, and aligned with cloud-native best practices.
PKE is explicitly designed for two audiences that traditional enterprise Kubernetes platforms ignore: homelab enthusiasts and small-to-medium enterprises (SMEs/KMUs). These are the engineers and organizations that need production-ready Kubernetes without enterprise-grade budgets or dedicated platform teams. After VMware's pricing restructuring drove thousands of customers toward Proxmox, the timing couldn't be more perfect.
The project is currently trending in the cloud-native community because it solves a genuine infrastructure gap. While Proxmox excels at virtualization and Cluster API dominates multi-cloud Kubernetes management, no elegant bridge existed between them—until now. PKE's zero-touch Proxmox node requirement (no SSH, no modifications) makes it uniquely deployable in restricted environments where security policies or operational constraints prevent direct hypervisor access.
With roadmap items including a web UI for cluster creation and migration to Cluster API v1beta2, PKE is actively evolving toward broader accessibility and long-term API stability.
Key Features That Make PKE Insanely Powerful
PKE isn't just another Kubernetes installer. It's a complete platform transformation for your Proxmox environment. Here's what separates it from everything else on the market:
Native Proxmox Storage Integration via proxmox-csi
Storage is where most Kubernetes-on-VM platforms fall apart. PKE integrates proxmox-csi-plugin directly, enabling dynamic provisioning of Proxmox-backed persistent volumes through standard Kubernetes StorageClasses. Your PVCs map to real Proxmox storage—whether that's ZFS, Ceph, LVM, or local directories—without manual intervention. This means kubectl apply -f pvc.yaml just works, with data living on your existing, battle-tested storage infrastructure.
Production-Grade Load Balancing with kube-vip
Every Kubernetes cluster needs reliable control plane and service load balancing. PKE deploys kube-vip to provide highly available virtual IP addresses for your API server and LoadBalancer-type services. No hardware load balancers. No complex keepalived configurations. Just declarative, cloud-native IP management that fails over automatically when nodes change.
eBPF-Powered Networking with Cilium
Networking in Kubernetes is notoriously complex. PKE ships with Cilium as the default CNI, bringing kernel-level eBPF acceleration, transparent encryption, and advanced observability to every cluster. Cilium's Hubble integration gives you flow-level visibility that traditional iptables-based CNIs simply cannot match. For security-conscious deployments, Cilium's network policies operate at Layer 3-7 with identity-based semantics—far more powerful than standard Kubernetes NetworkPolicy.
Fully API-Driven Architecture
Every operation in PKE flows through Kubernetes-style APIs. Create a cluster by applying a YAML manifest. Scale it by modifying a field. Delete it with a single command. This GitOps-ready approach means your entire infrastructure becomes version-controlled, auditable, and reproducible. The architecture is completely based on Cluster API, so skills transfer directly to AWS↗ Bright Coding Blog, Azure, GCP, or any of the 30+ other infrastructure providers.
Zero Proxmox Node Modifications
This cannot be overstated: PKE requires no SSH access to Proxmox nodes and no installed agents. It operates entirely through Proxmox's REST API using standard credentials. This is a massive security and operational win—you can deploy Kubernetes clusters in environments where direct hypervisor access is prohibited or where you simply don't want to maintain custom scripts on every node.
Real-World Use Cases Where PKE Dominates
The Homelab Kubernetes Platform
You've got a 3-node Proxmox cluster in your basement, lovingly assembled from decommissioned enterprise hardware. You want to run actual workloads—media servers, home automation, development environments—but manually managing VMs is exhausting. PKE turns your homelab into a self-service Kubernetes platform. Spin up a new cluster for a project in minutes, tear it down when done, never touch Proxmox's UI again.
SME Private Cloud Replacement
Your business outgrew public cloud costs but got burned by VMware's licensing changes. Proxmox is your new foundation, but you still need container orchestration for customer-facing applications. PKE delivers enterprise Kubernetes patterns without enterprise pricing—HA control planes, automated upgrades, persistent storage, and load balancing—all on hardware you own and control.
Multi-Tenant Development Environments
Platform teams need to provide isolated Kubernetes environments to multiple development groups. With PKE, each team gets their own cluster through simple API calls, with resource quotas enforced at the Proxmox level. No more "noisy neighbor" problems from shared clusters. When a project ends, the entire cluster disappears cleanly.
Disaster Recovery and Cluster Sprawl Management
Traditional Kubernetes installations become snowflakes—each one slightly different, each one a maintenance burden. PKE's declarative model means every cluster is reproducible from Git. When hardware fails, redeploy identically. When you need ten clusters for testing, generate them from the same templates. Consistency at scale, finally achievable on-premises.
Step-by-Step Installation & Setup Guide
Getting PKE running requires a management Kubernetes cluster and proper Proxmox credentials. The official Quick Start guide provides the complete path, but here's the essential workflow:
Prerequisites
- Proxmox VE 7.x or 8.x environment with API access
- A management Kubernetes cluster (the Quick Start uses K3s on a dedicated VM)
clusterctlCLI tool installed locally- kubectl configured for your management cluster
Step 1: Install Cluster API on Your Management Cluster
# Initialize Cluster API with the Proxmox provider
clusterctl init --infrastructure proxmox
This deploys the Cluster API core components and the Proxmox-specific infrastructure provider (CAPMOX) that PKE extends.
Step 2: Configure Proxmox Credentials
Create a secret containing your Proxmox API credentials:
apiVersion: v1
kind: Secret
metadata:
  name: proxmox-cluster-secret
  namespace: default
type: Opaque
stringData:
  # Proxmox API endpoint - use HTTPS
  PROXMOX_URL: "https://your-proxmox-host:8006/api2/json"
  # API token or username/password for authentication
  PROXMOX_TOKEN: "your-api-token-here"
  # Skip TLS verification for self-signed certs (homelab only!)
  PROXMOX_INSECURE: "true"
Apply with kubectl apply -f proxmox-secret.yaml.
Step 3: Generate Your Cluster Configuration
PKE uses standard Cluster API manifests. Generate a template:
# Set environment variables for cluster configuration
export CLUSTER_NAME=my-first-pke-cluster
export NAMESPACE=default
export KUBERNETES_VERSION=v1.28.0
export CONTROL_PLANE_MACHINE_COUNT=3
export WORKER_MACHINE_COUNT=3

# Generate cluster manifest from PKE's cluster template
clusterctl generate cluster ${CLUSTER_NAME} \
  --infrastructure proxmox \
  --kubernetes-version ${KUBERNETES_VERSION} \
  --control-plane-machine-count ${CONTROL_PLANE_MACHINE_COUNT} \
  --worker-machine-count ${WORKER_MACHINE_COUNT} \
  > cluster.yaml
Step 4: Deploy Your Kubernetes Cluster
# Apply the generated manifest - this triggers cluster creation
kubectl apply -f cluster.yaml

# Watch your cluster come to life
kubectl get cluster
kubectl get machines
Cluster API controllers will communicate with Proxmox via API, creating VMs from cloud-init templates, joining them into a Kubernetes cluster, and configuring all integrated components (Cilium, kube-vip, proxmox-csi).
Step 5: Access Your New Cluster
# Extract kubeconfig for the workload cluster
clusterctl get kubeconfig ${CLUSTER_NAME} > ${CLUSTER_NAME}.kubeconfig

# Verify connectivity
kubectl --kubeconfig=${CLUSTER_NAME}.kubeconfig get nodes
Your Proxmox-based Kubernetes cluster is now operational and ready for workloads.
REAL Code Examples: PKE in Action
Let's examine actual implementation patterns from the PKE ecosystem, with detailed explanations of how each component functions.
Example 1: Cluster API Machine Template for Proxmox
This is the core building block—defining how Proxmox VMs are created for Kubernetes nodes:
apiVersion: infrastructure.cluster.x-k8s.io/v1beta1
kind: ProxmoxMachineTemplate
metadata:
  name: pke-control-plane-template
  namespace: default
spec:
  template:
    spec:
      # Proxmox node to deploy on (or auto-schedule)
      nodeName: "pve-01"
      # VM hardware configuration
      hardware:
        cpu: 4
        memory: 8192
        # Disk size in GB, using Proxmox storage
        disk: "32G"
      # Network configuration
      network:
        bridge: "vmbr0"
        # Static IP configuration via cloud-init
        ipConfig:
          ipv4:
            address: "192.168.1.10/24"
            gateway: "192.168.1.1"
      # Cloud-init template to use as base
      templateID: 9000
      # Proxmox storage pool for VM disks
      storage: "local-zfs"
What's happening here? This ProxmoxMachineTemplate is a Cluster API custom resource that tells the Proxmox infrastructure provider exactly how to create VMs. The templateID: 9000 references a pre-built cloud-init template in Proxmox—typically an Ubuntu or Debian image with Kubernetes prerequisites pre-installed. When Cluster API needs a new control plane node, it clones this template, applies the specified hardware and network configuration, and bootstraps it into the cluster. The storage: "local-zfs" ensures disks land on your ZFS pool with all its features (compression, snapshots, replication).
Example 2: Cilium Network Configuration
PKE leverages Cilium for networking. Here's how the CiliumConfig might appear in a PKE deployment:
apiVersion: cilium.io/v2alpha1
kind: CiliumConfig
metadata:
  name: pke-cilium-config
  namespace: kube-system
spec:
  # Enable eBPF-based kube-proxy replacement
  kubeProxyReplacement: true
  # Enable Hubble observability
  hubble:
    enabled: true
    relay:
      enabled: true
    ui:
      enabled: true
  # Enable Layer 7 policy support
  l7Proxy: true
  # IPAM configuration for Pod CIDR
  ipam:
    mode: "kubernetes"
  # Native routing mode for performance
  routingMode: "native"
  # Direct routing interface
  directRoutingDevice: "eth0"
Why this matters: Traditional Kubernetes networking uses kube-proxy with iptables—slow, opaque, and hard to debug. By setting kubeProxyReplacement: true, Cilium takes over service load balancing entirely in eBPF, delivering significant latency reductions and removing a whole layer of complexity. The Hubble components (relay, ui) provide real-time flow visibility—click through to see exactly which pod talked to which service, with DNS names and HTTP paths. For PKE clusters running on Proxmox, this native routing mode avoids unnecessary encapsulation overhead since all nodes typically share a flat network.
Example 3: Persistent Volume Claim Using proxmox-csi
Here's how workloads consume Proxmox storage through standard Kubernetes APIs:
apiVersion: v1
kind: PersistentVolumeClaim
metadata:
  name: postgres-data
  namespace: production
spec:
  accessModes:
    - ReadWriteOnce
  storageClassName: proxmox-zfs  # PKE-provisioned StorageClass
  resources:
    requests:
      storage: 50Gi
---
apiVersion: apps/v1
kind: StatefulSet
metadata:
  name: postgres
spec:
  serviceName: "postgres"
  replicas: 1
  selector:
    matchLabels:
      app: postgres
  template:
    metadata:
      labels:
        app: postgres
    spec:
      containers:
      - name: postgres
        image: postgres:16
        volumeMounts:
        - name: data
          mountPath: /var/lib/postgresql↗ Bright Coding Blog/data
      volumes:
      - name: data
        persistentVolumeClaim:
          claimName: postgres-data
The magic: When this PVC is created, the proxmox-csi-plugin (integrated by PKE) receives the request through Kubernetes' standard CSI mechanisms. It calls Proxmox's API to create a new ZFS volume (or Ceph RBD, or LVM, depending on your StorageClass configuration), attaches it to the appropriate VM, and mounts it into the PostgreSQL container. To the application, this is just standard Kubernetes storage. To the infrastructure team, it's Proxmox storage with all its enterprise features—snapshots, replication, thin provisioning—automatically managed.
Advanced Usage & Best Practices
GitOps-Driven Cluster Lifecycle
Store all PKE cluster manifests in Git and use Flux or Argo CD for reconciliation. This enables full cluster reproducibility—disaster recovery becomes git clone && kubectl apply. Version your cluster configurations alongside application code.
Template Optimization
Pre-build optimized cloud-init templates in Proxmox with containerd, kubelet, and kernel modules pre-installed. This dramatically reduces node boot time. Use Packer or similar tools for automated template builds.
Resource Quotas at Proxmox Level
Since PKE creates actual Proxmox VMs, enforce resource limits using Proxmox's built-in pool quotas. This prevents runaway cluster growth from impacting other infrastructure.
Backup Integration
Leverage Proxmox's native backup (vzdump) for VM-level disaster recovery, while using Velero for Kubernetes-native resource and PV backup. This dual-layer approach covers both infrastructure and application state.
Monitoring Stack
Deploy Prometheus with node-exporter on PKE clusters, and use Proxmox's built-in metrics server for hypervisor-level visibility. Correlate VM resource usage with pod metrics for complete stack observability.
PKE vs. The Alternatives: Why This Wins
| Feature | PKE | OpenShift | Tanzu | Rancher | Manual Setup |
|---|---|---|---|---|---|
| Proxmox Native | ✅ Yes | ❌ No | ❌ No | ⚠️ Partial | ✅ Yes |
| Zero Node Modifications | ✅ Yes | ❌ Requires agents | ❌ Requires agents | ❌ Requires agents | ❌ Heavy scripting |
| Cluster API Standard | ✅ Yes | ⚠️ Custom | ⚠️ Custom | ⚠️ Custom | ❌ None |
| Cost | 🟢 Free | 🔴 $$$$ | 🔴 $$$$ | 🟡 $$ | 🟢 Free |
| Complexity | 🟢 Low | 🔴 High | 🔴 High | 🟡 Medium | 🔴 Very High |
| HA Load Balancing | ✅ kube-vip | ✅ Built-in | ✅ NSX | ✅ Various | ❌ Manual |
| eBPF Networking | ✅ Cilium | ⚠️ Optional | ❌ No | ⚠️ Optional | ❌ Manual |
| Storage Integration | ✅ Native CSI | ✅ CSI | ✅ CSI | ✅ CSI | ❌ Manual |
| Web UI | 🟡 Roadmap | ✅ Yes | ✅ Yes | ✅ Yes | ❌ No |
The verdict: PKE occupies a unique position. It's the only Cluster API-native, zero-modification solution for Proxmox that doesn't carry enterprise licensing overhead. For organizations that chose Proxmox specifically to escape VMware's pricing, Tanzu and OpenShift are non-starters. Rancher is excellent but adds another layer of complexity and still requires node-level agents. Manual setup gives you control but consumes endless engineering hours and produces unmaintainable snowflakes.
PKE gives you enterprise patterns with homelab simplicity.
FAQ: Your Burning Questions Answered
Q: Does PKE modify my Proxmox nodes or require SSH access? A: Absolutely not. This is PKE's standout feature. All operations flow through Proxmox's REST API using standard authentication. Your Proxmox nodes remain completely untouched—no installed agents, no SSH keys, no custom scripts.
Q: What Kubernetes distributions does PKE support? A: PKE leverages Cluster API's bootstrap providers, making it distribution-agnostic. The Quick Start demonstrates K3s for the management cluster, but workload clusters can use kubeadm, K3s, RKE2, or other CAPI-compatible bootstrappers.
Q: Can I use PKE in production, or is it just for homelabs? A: While designed with homelabbers and SMEs in mind, PKE's architecture—built on CNCF-graduated Cluster API with battle-tested components like Cilium and kube-vip—is production-suitable. As with any infrastructure, validate thoroughly for your specific requirements.
Q: How does storage performance compare to bare-metal Kubernetes? A: Since PKE runs Kubernetes on Proxmox VMs, there's a minimal virtualization overhead. However, proxmox-csi enables direct storage integration that bypasses many traditional virtualization penalties. For maximum performance, use VirtIO drivers and allocate sufficient IOPS.
Q: What's the upgrade path for Kubernetes clusters?
A: Cluster API provides declarative cluster upgrades. Modify the KubernetesVersion field in your cluster specification, and CAPI orchestrates rolling upgrades of control plane and worker nodes automatically—no manual VM rebuilds required.
Q: Is there a web UI, or is everything command-line? A: Currently PKE is CLI/API-driven, aligning with GitOps practices. A web UI for cluster creation is explicitly on the roadmap. For visual management, tools like Rancher can optionally be deployed atop PKE clusters.
Q: How does PKE relate to CAPMOX (the Proxmox Cluster API provider)? A: PKE builds upon and extends the CAPMOX infrastructure provider, adding opinionated integrations (Cilium, kube-vip, proxmox-csi) and simplified configuration for common deployment patterns. Think of CAPMOX as the engine, PKE as the tuned vehicle.
Conclusion: Your Proxmox Infrastructure Deserves Better
You've felt the pain—manual VM provisioning, fragile shell scripts, the endless gap between "I need a Kubernetes cluster" and "my cluster is ready." You've seen the alternatives—enterprise platforms that cost fortunes, complex solutions that demand dedicated teams, or the do-it-yourself route that consumes your nights and weekends.
PKE (Proxmox Kubernetes Engine) is the escape hatch you didn't know existed. By combining Proxmox's proven virtualization with Cluster API's cloud-native orchestration, it delivers something genuinely rare: enterprise-grade Kubernetes automation with homelab-grade simplicity. No SSH hacks. No node modifications. No licensing nightmares. Just declarative, API-driven cluster management that transforms your existing Proxmox investment into a genuine Kubernetes-as-a-Service platform.
The cloud-native future isn't only for hyperscalers with infinite budgets. It's for the engineer in their basement, the SME with a tight infrastructure team, the organization that chose open source precisely to control their own destiny. PKE makes that future accessible, practical, and remarkably elegant.
Stop wrestling with your infrastructure. Start orchestrating it.
👉 Explore PKE on GitHub — star the repository, try the Quick Start, and join the growing community of engineers who've discovered that Proxmox and Kubernetes, properly united, are an absolutely unstoppable combination.
Your clusters are waiting. Your API is ready. Deploy something amazing.